Wednesday, September 26, 2018

Microscan MicroHawk: Connecting via your web browser

The MicroHawk has a default IP address of 192.168.188.2

Power up the MicroHawk and plug the ethernet cable into you computer.
You should see a LINK and PWR light


You may need to change you ethernet settings to match those of the MicroHawk.

On windows 10, in the search box at the bottom of the screen type Change Ethernet Settings.  Hit enter.

Click on Change adapter options


Right click on the Ethernet adapter.  Select the Properties menu item.

Click on Internet Protocol Version 4(TCP.IPv4) to highlight it.  Then click the Properties button.

When the properties window opens it will indicate that Obtain an IP address automatically is selected.


Click on Use the following IP address:
Enter IP address: 192.168.188.33
and enter Subnet Mask: 255.255.255.0
Click OK.

Open a web browser.
Type the IP address of the MicroHawk into the URL bar, the address is 192.168.188.2

When the browser starts to connect to the MicroHawk the WEBLINK page will be displayed.

Once the connection is complete the MicroHawk web control page will display with a live image.

Here's a link to the manual. MicroHawkidmanual.pdf

Here are some sample codes:


Link to the codes in PDF sample codes

Wednesday, August 15, 2018

Microscan MicroHawk: Default code read communication out via TCP port 2001


The result of a code read is typically sent over Ethernet on port 2001.   The Telnet client in Windows 10 can display the code read data.

Use the setup window to check what port numbers are used for TCP communication.

Start at the MicroHawk's web interface, located at 192.168.188.2

Gear icon in top right to view setup menu

Click the gear icon to display the setup menu

The advanced icon will open the settings window

Click the Advanced icon to open the settings window.

There are two TCP ports for communication, note what value Port 1 has.
Make a note of the value next to TCP Port 1.  This will be the port number used to connect the telnet client in order to see the read data.

The telnet client can be run from the windows command prompt.

Enter CMD in the search box next to the windows icon, and open the command prompt.


This is usually found at the bottom left of the display.

At the command prompt, start the telnet client by entering the following line:
Telnet 192.168.188.2 2001

Telnet is the command, you need the IP address of the MicroHawk and the port number from settings.
Telnet is the command.  It is followed by a space, then the IP address of the MicroHawk.  Then another space.  Finally the port number from the settings window.

If the Telnet command is not recognized, you need to enable it as a windows feature, see this link:
http://lowtechllcblog.blogspot.com/2018/06/enabling-telnet-on-windows-10.html

Once connected every good read will send the value of the code.


The web interface has a built in terminal to see the formatted data. 
The web interface terminal window will display the formatted data on a good read.


Saturday, July 21, 2018

Omron FQ2-S smart vision sensor

Overview and first impressions 
Omron FQ2-S25100F Color smart camera


Let me start out by saying I have avoided omron vision systems for over 10 years.  Back in ~ 2005, 2006, 2007 I had a few projects that used the Omron F150 and F160 vision systems.  I thought the software was limiting.  The only way to program it was with a proprietary keypad.  The camera and the controller were separate items.  It was just too much trouble to use, so I avoided it.  Fast forward to today...

Omron's current smart camera, the FQ2-S, is an improvement over the F150 and F160.  The FQ2-S is one unit, camera, light and vision processor in one.  It is optimized for high speed inspections.  It can be programmed with a computer or with a small touchscreen display via Ethernet.  It performs very well when imaging glossy/reflective surfaces when the included polarizing filter is used.  For basic patterns, edge, and code reading it does a good job.  The software steps you through connecting, getting an image, adding an inspection, and automatically drives the OK/NG (No Good) output.  

There are some problems.  Mainly, when you go outside of the basic setup things get confusing again.  For instance, I still haven't figured out how to move inspection tools based on the results of previous tools.  Along the same lines, Instead of moving the tools, it appears that the image is moved and rotated.   That causes part of the image to be clipped.  

[Documentation doesn't include any code read examples]

The image sensor make and model is not listed in the documentation.  It is likely an OmniVision OV07962 sensor.  The color reproduction looks like it is 16 bit RGB 565 (not 24bit RGB 888).  This limits the color dynamic range to 5 or 6 bits per channel (instead of the typical 8)  The video is susceptible to electrical noise (hum).  When the built in LED's are used the longest exposure is limited to 1/250th sec (4ms).  The longest exposure when the LED's are disabled is 1 second; but you have to experiment with settings to figure that out.  

Working distance is about 16 inches.
  

Some example images using the built in light.
Depth Of Field 


Color reproduction
Auto white balance

For sale: 24VDC power supply


Just a note, I'm selling a few 24V DC power supplies.


This is pretty handy when your working in an industrial control lab.

$9.10 plus shipping

Ebay link to power supply

It's a 60 watt 24V DC 2.5 Amp supply with a 5.5 x 2.1 mm barrel plug.
Also comes with a 6' U.S. power cord.

All Ebay items for sale

Wednesday, June 27, 2018

Enabling Telnet on Windows 10

Telnet is not enabled by default.  

You might see this when you try to use Telnet:
'telnet' is not recognized as an internal or external command, operable program or batch file.

It means that Telnet was not activated on the PC.


Activate Telnet as a windows feature

Open apps and Features


Click the "Programs and Features" text on the right.
 The Programs and Features window will appear.

Click "Turn Windows Features On or Off" on the left.
 The "Windows Features" window will appear.

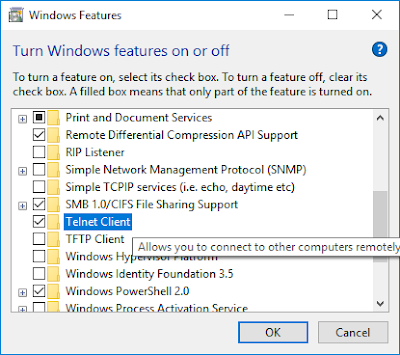
Scroll down to Telnet Client.
Click to check the box next to Telnet Client.

OK your way out.

Check that Telnet works

Open Command Prompt 

Enter the command:
telent


This will connect to the PC's telnet port.  The Microsoft Telent client will be displayed.
Enter q to quit and return to the command prompt


Microscan MicroHawk: Switching ID and MV modes


The Microscan MicroHawk MV-40  and ID-40 can run ID code reader or Machine Vision firmware.

These are the steps to boot it to either firmware.

Plug it in
Plug in the power and the Ethernet cable.  Get a power and a link light.


Setting IP address

The default IP address and subnet are:
192.168.188.2
255.255.0.0

Set your PC's network card to:
192.168.188.225
255.255.0.0

Open Settings | Ethernet.  Click on Change adapter settings.


Right click the Ethernet card, select Properties.
Click Internet Protocol 4
Enter the IP address and subnet:
192.168.188.225
255.255.0.0

Then OK your way back out.


Ping to check connection


Open the command prompt.
Enter the command:
ping 192.168.188.2

You should get 4 replies from the camera if all the IP's are right.


Telnet to camera to change boot settings

Enter the command:
telnet 192.168.188.2

   If Telnet doesn't run follow the instructions here to activate it as a Windows feature:
           http://lowtechllcblog.blogspot.com/2018/06/enabling-telnet-on-windows-10.html


You will be asked to log in to the camera
The login is:
target
The password is:
password

Once logged in the prompt will change to ->

To see the camera license enter the command:
BP_Dump


The ID code read license is AutoVision or AutoID, and the Machine Vision license will have a name like MV or Machine Vision.


Check the firmware available (command: sbp)

Command sbp will show the boot parameters

A list of firmwars will be displayed.
There is an arrow [=>] pointing at the firmware the camera is using right now.

In the image above, the camera is using Firmware #4, the machine vision firmware.


Change the boot option (booting a different firmware)
(Command: lbp #      that is lower case "LBP")  

Enter the command lbp 3   [the format is lbp #  where # is the number of the firmare in the list]
This will set the camera to boot the AutoID firmare.
The camera will reboot.


To change it back, youo need to Telnet in again and use command lbp 4


Web Page
You can also tell what firmware is running by opening the camera's web page.
Open your browser and enter 192.168.188.2

The ID reader web page looks like:


The Machine Vision web page looks like:


Sunday, May 13, 2018

Machine Vision Lens Comparison: Focal length range 23 mm to 25 mm. From Schneider, Ricoh Pentax, Tamron, Edmund Optics and Fujinon

I typically use Fujinon HF sereis lenses.  They are good quality construction and cost under $150 new.  I don't have any complaints, but how do they compare to the rest of lens manufacture's products?  There are more expensive lenses, such as the Schneider Xenoplan at $900+.  What does that extra money get you?  There are some new designs, such as the Edmund Optics C series and UC series.  Do the new lens designs learn from and improve on the old designs?  Is there a better lens than that I use?  To answer that I tested lens performance with two targets.

To measure distortion I used a dot grid and LabView to calculate lens distortion.

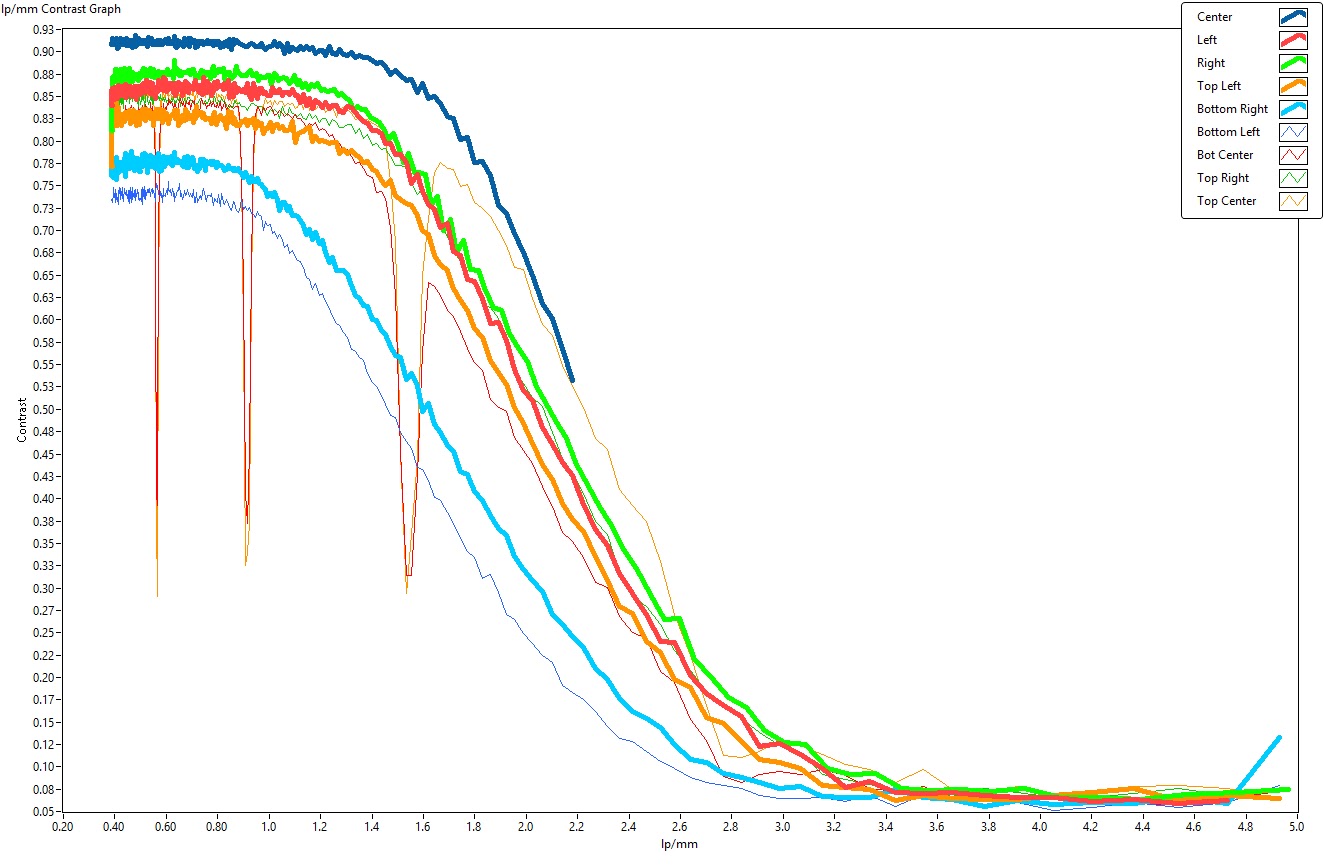
To measure sharpness I used a star target.  The maximum edge strength vs line pair per mm is used to compare the center to the edges.
http://stores.ebay.com/vitamall


The targets can be purchased from the ebay store Vitamall 

ebay is a great place to get used test equipment on the cheap.  All the lenses were from my old stock, or purchased for this test on ebay.

The same camera was used for all tests.
Camera: JAI BM-500GE   2/3" CCD     3.45 um pixels   2456 x 2048

All Lenses were tested at F/4.0


*Note: Bottom Right lighting had a problem.  The contrast was low on all bottom right star target inspections.  It is represented as the cyan curve in the graph.  This was an error I failed to correct for.


Edmund Optics 25 mm/F1.4 59871
Focal Length 25 mm
Working Distance: 860 mm
$295
Distortion: 0.05911 %
30% contrast @ 2.3 lp/mm to 2.7 lp/mm


Note, right side lighting had a problem.  The over-all contrast on the right stars is lower than it should have been.


Fujinon HF25HA-1B
Focal Length 25 mm
Working Distance: 860 mm
$120
Distortion: 0.07101 %
30% contrast @ 2.0 lp/mm to 2.4 lp/mm


Ricoh FL-CC2514-2M  (Pentax brand)


Focal Length 25 mm
Working Distance: 860 mm
?$150
Distortion: 0.06061 %
30% contrast @ 2.2 lp/mm to 2.6 lp/mm


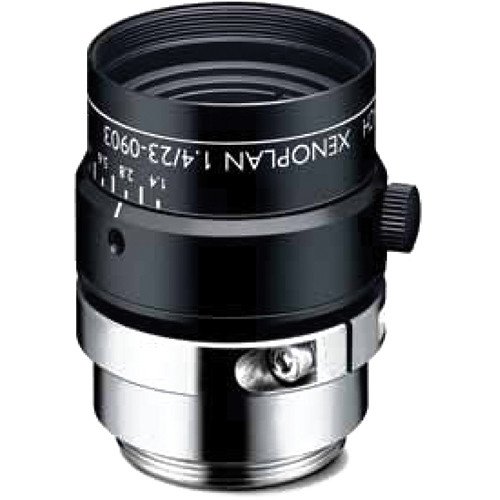
Schneider Xenoplan 1.4_23-0501


Focal Length 23 mm
Working Distance: 770 mm
?$900 (Discontinued)  ($1,275.00)
Distortion: 0.07062 %
30% contrast @ 2.3 lp/mm to 2.7 lp/mm


Schneider Xenoplan 1.4_23-0912

Focal Length 23 mm
Working Distance: 770 mm
$1,275.00
Distortion: 0.06831 %
30% contrast @ 1.8 lp/mm to 2.6 lp/mm


Tamron 25mmF1.4 23FM25SP (B201528) 2/3" format

Focal Length 25 mm
Working Distance: 860 mm
$157
Distortion: 0.06801 %
30% contrast @ 1.7 lp/mm to 2.2 lp/mm